This article explains how to add the Melissa Data Express Entry Autocomplete control to a Microsoft Dataverse model-driven form. These steps must be done by an administrator or a user with system customization privileges.
Configure Express Entry Autocomplete on a model-driven form
To keep the example simple, we use the Account table and its Address 1 columns. The configuration is the same for other tables and columns, standard or custom.
Before you start, create an API Configuration record for Melissa Express Entry (see Set up your Melissa API key).
- In the Power Apps Maker Portal, select the environment where Address Validation for Dataverse is installed. Go to Tables > Account > Forms (or open the table from your solution) and open the main form you want to use.
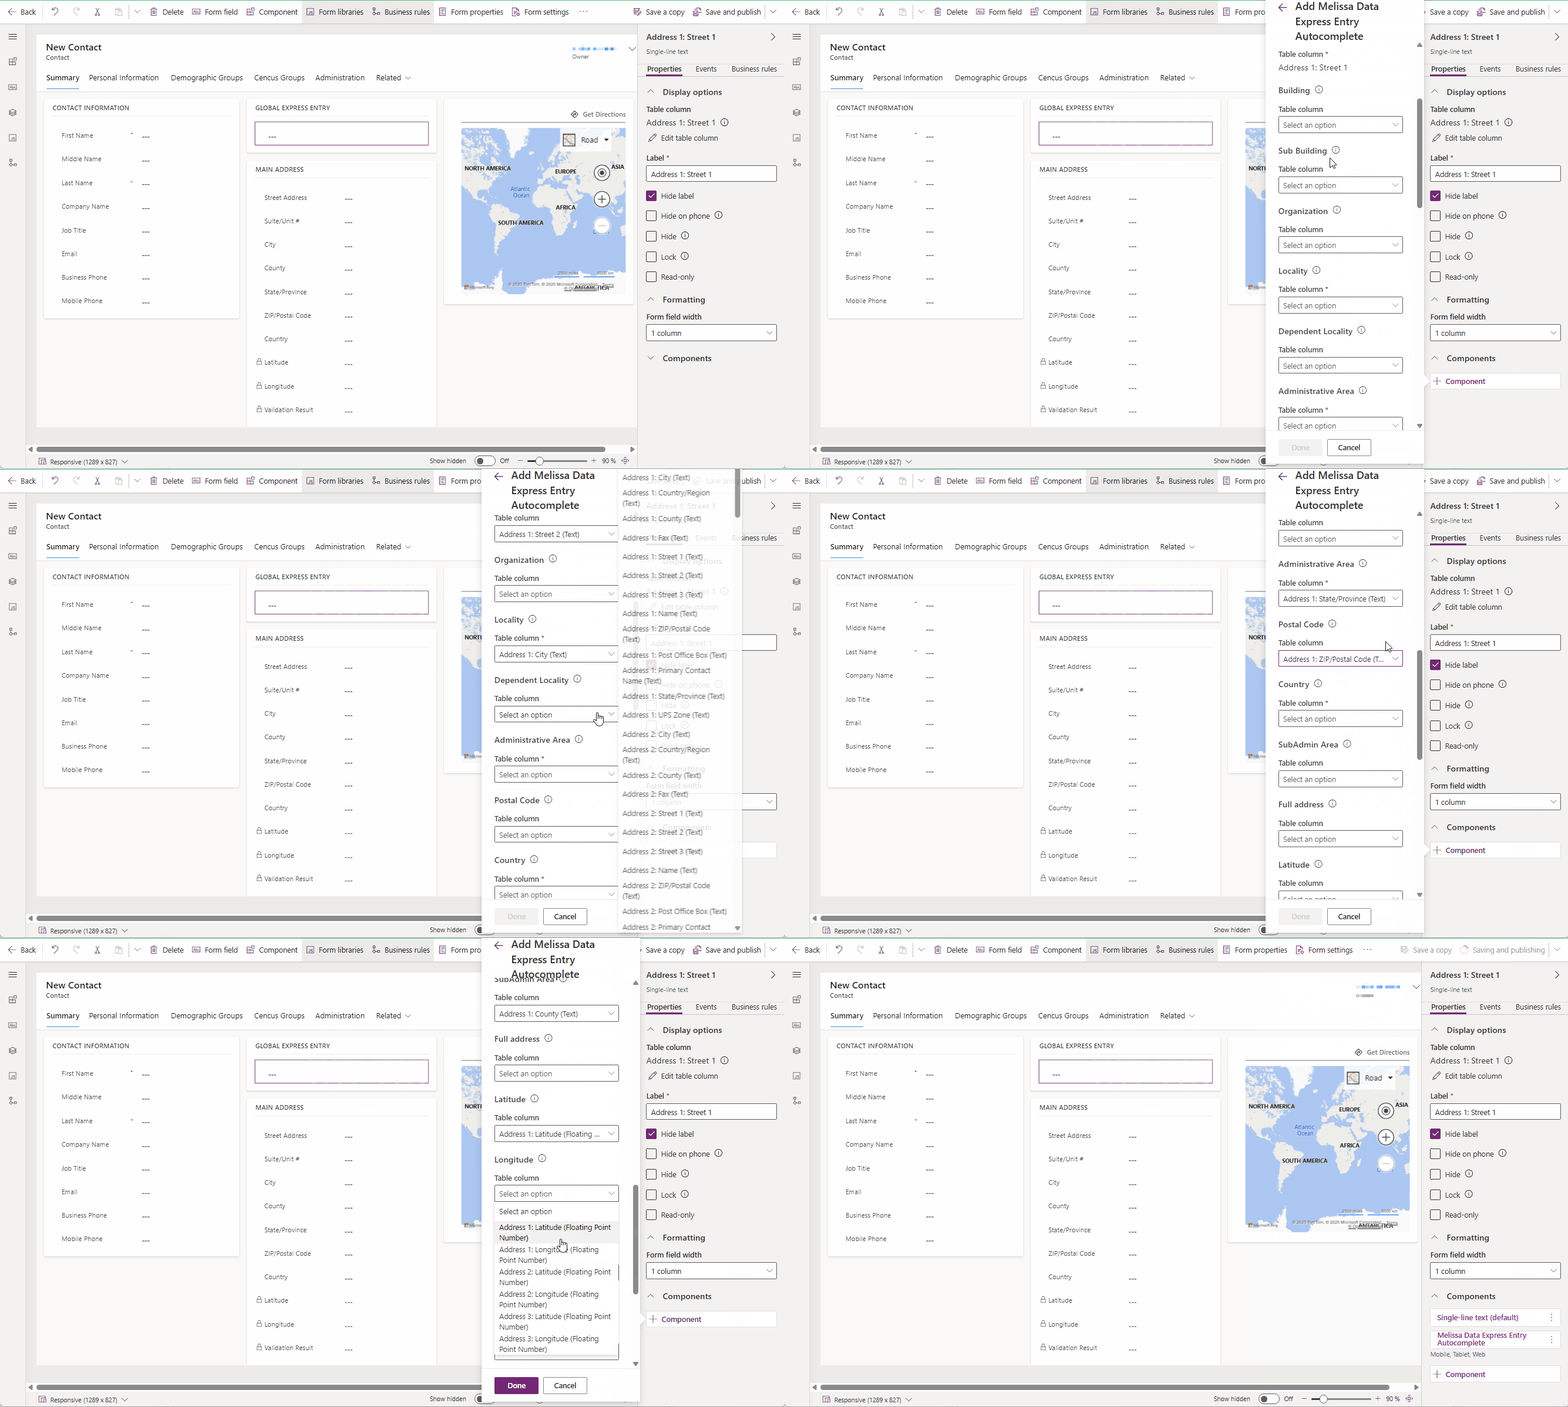
- In the form designer, select the Address 1: Street 1 column. You can also find it with Tree view. In the properties pane, select Hide label.
- In the properties pane, expand Components and select + Component.
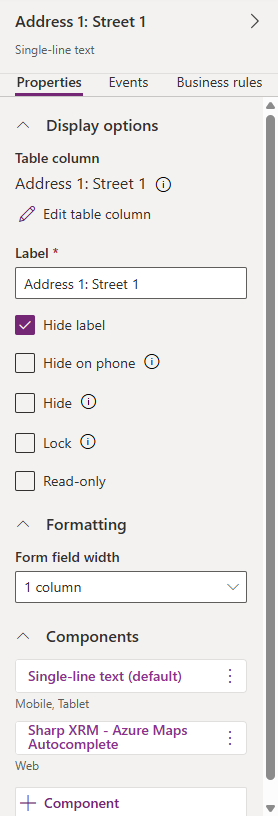
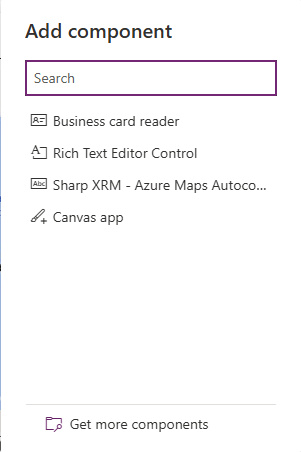
- In Add component, select Melissa Data Express Entry Autocomplete. If it isn't listed, select Get more components, add the control, and then select it.
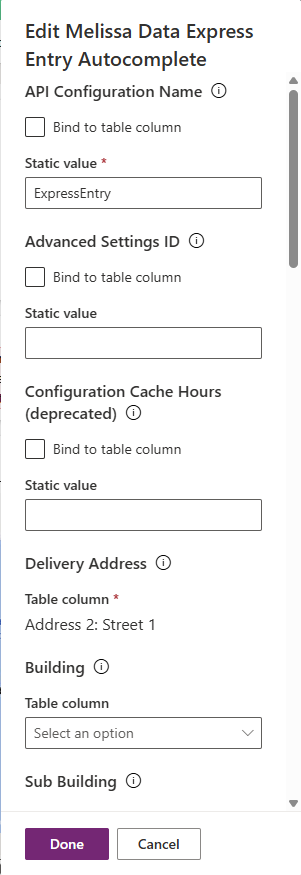
- Configure the control properties described in the table below. For API Configuration Name, Advanced Settings ID and the country options, enter a static value. For each address property, select the table column where the value should be stored.
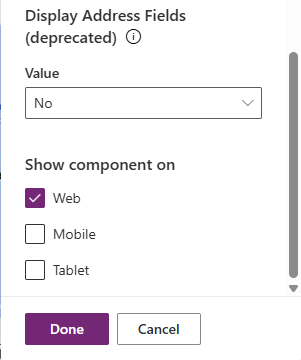
- Under Show component on, select where the control should be used (Web, Mobile, Tablet) and select Done.
- Select Save and publish, then open an account record to test the control.
Walkthrough
The following animation shows the complete configuration in the form designer.
Control properties
| Property | Description | Value type |
|---|---|---|
| API Configuration Name * | The unique name of your Melissa Express Entry API Configuration record. | Static value |
| Advanced Settings ID | If you use Address Control Settings, the Identifier of your setting record. | Static value |
| Configuration Cache Hours | Optional. Leave empty. Current versions of the control manage the browser cache automatically and show this property as deprecated. | Static value |
| Delivery Address * | Column to store the first line of the delivery address. This is the column the control is placed on. | Single line of text |
| Building | Column to store the building name, when available. | Single line of text |
| Sub Building | Column to store the subdivision within a building, such as a suite or apartment. | Single line of text |
| Organization | Column to store the organization at the address, when available. | Single line of text |
| Locality * | Column to store the locality, also known as city or canton. | Single line of text |
| Dependent Locality | Column to store the area smaller than the locality, when needed for the mailing address. | Single line of text |
| Administrative Area * | Column to store the state or province. | Single line of text |
| Postal Code | Column to store the full postal code. Express Entry returns extended US ZIP codes (ZIP+4) by default; see Advanced Settings to turn this off. | Single line of text |
| Country * | Column to store the country. The long name is used by default; see Advanced Settings for ISO2 or ISO3. | Single line of text |
| SubAdmin Area | Column to store the sub-administrative area, also known as county. | Single line of text |
| Full address | Optional column for the complete formatted address. | Single line of text |
| Latitude | Column to store the latitude. | Floating point number |
| Longitude | Column to store the longitude. | Floating point number |
| Default Country | Country selected when the form opens, as an ISO 3166-1 alpha-2 code (for example US). | Static value |
| Display Countries | Countries users can select, as comma-separated ISO alpha-2 codes without spaces (for example US,CA,MX). Leave empty to show all countries. | Static value |
| Top Countries | Countries pinned to the top of the list, as comma-separated ISO alpha-2 codes (for example CA,US). | Static value |
| Display Address Fields (deprecated) | No longer used. Leave it set to No and add the individual address columns to the form. | Yes / No |
| Return Native CharSet | Yes returns results in the country's native character set (for example Cyrillic, Greek or Chinese). No (default) returns transliterated results in the Latin character set. | Yes / No |
| Replace diacritics | Yes replaces accented characters with their non-accented Latin equivalents. No (default) keeps diacritics as returned by Melissa. | Yes / No |
* Required. A Default Country or Top Country must also be listed in Display Countries (when Display Countries is used). If a record's country is not in Display Countries, the value is saved but is not shown in the control.
Working with Advanced Settings
Address Control Settings let administrators control the format of returned values, for example ISO2 country codes or PO Box results.
- In the Address Validation for Power Apps app, go to Settings > Address Control Settings and select + New.
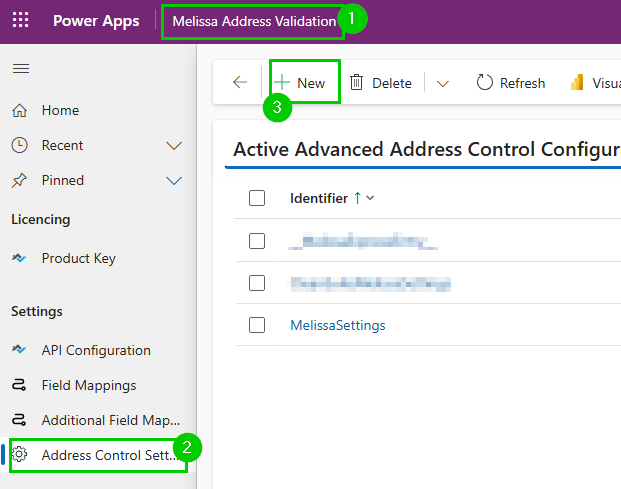
- Enter a unique Identifier. This is the value you enter in the control's Advanced Settings ID property.
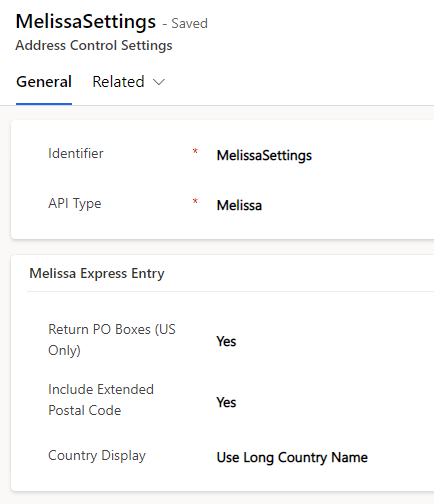
- Set API Type to Melissa and choose the parameters below.
| Parameter | Possible values | Description |
|---|---|---|
| Return PO Boxes | Yes / No | US only. Lets the control return PO Boxes along with street addresses. If no setting is used, PO Boxes are returned. |
| Include Extended Postal Code | Yes / No | Adds the +4 extension to US ZIP codes when available. If no setting is used, extended postal codes are returned. |
| Country Display | Use ISO2 Country Code / Use ISO3 Country Code / Use Long Country Name | For example, CA, CAN or Canada. |
Note: Address Control Settings are cached in each user's browser and refresh automatically when the cached copy expires. To apply a change immediately, users can clear their browser cache.
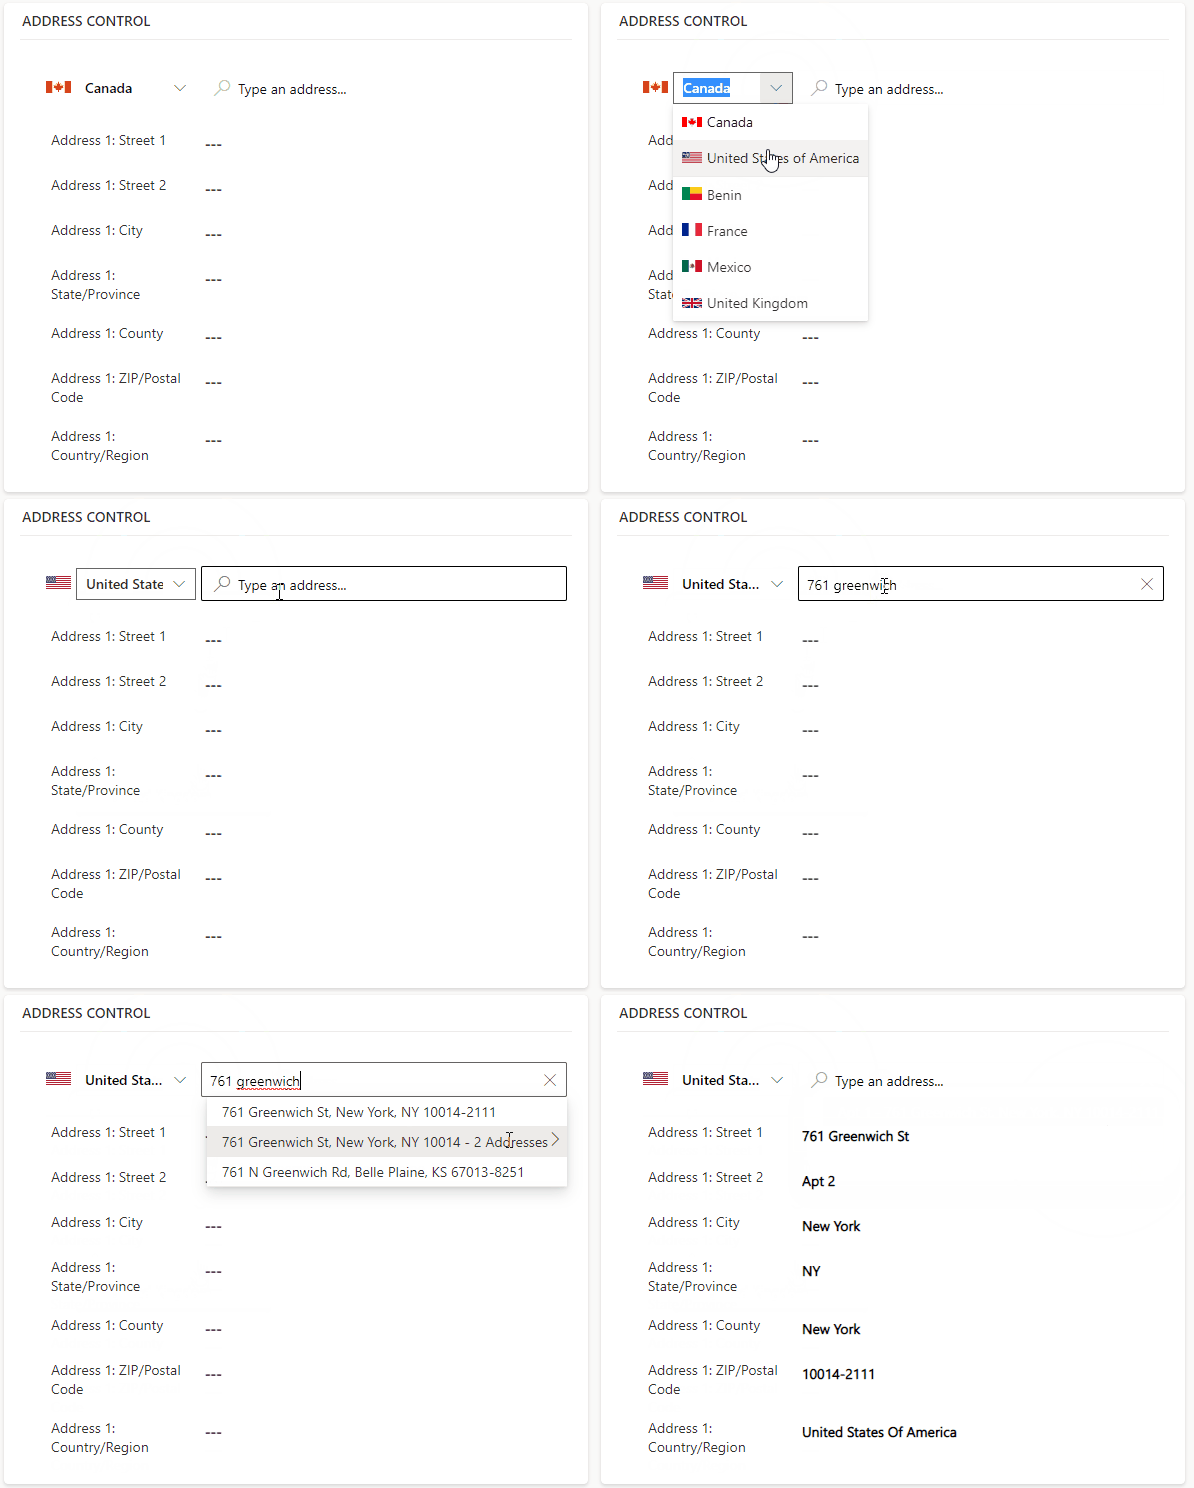
Visual example in a model-driven form
Assign the required security privileges to users
After configuration, assign the required security roles to users so they can use the autocomplete controls. See Assign privileges for users.